My sister , my cousin and I will be hosting a baby shower tomorrow for our cousin.
We will be welcoming their Baby Boy to the world whom they have been patiently waiting for 7 years.
And since one of the purpose of Baby Showers is to help parents replenish their supply of baby items, I made a Baby Blanket, which I would like to share to you a tutorial on how to do it.
I've done some Burp Cloths and a Ribbon Tag Toy since there were extra fabric.
I will be placing these baby things into the Diaper Motorcycle (which I will be posting next time) and these would be my gift to them.
Baby Blanket Tutorial
Step 1.
Cut out 2 Flannel Fabrics. Printed and Plain Colored. Size is 32"x32". You can have it bigger or smaller.
Step 2.
Round the corners.
Step 3.
Face right sides together.
Step 4.
With 1/2" allowance, sew the edges.
Step 5.
Leave about 5" long not sewn.
Step 6.
Turn inside out.
Step 7.
As close to the edge, sew the part you have not sewn, this time, on the right side.
Step 8.
This is how it would look like when you are done.
Step 9.
Choose a decorative stitch or you can opt for the basic stitch.
Step 10.
Using the decorative stitch and a thread with coordinating color with the printed fabric, sew along the edges.
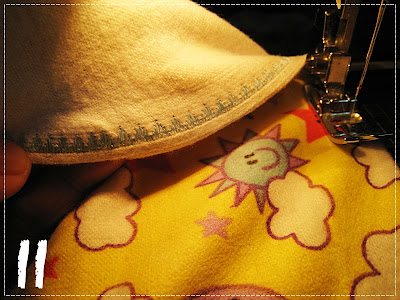
Step 11.
Back part
Life is not Perfect....and so is my Sewing.
My sewing session is not complete without these happening.. a big thanks to the Seam Ripper!
Finish Baby Blanket
With the extra fabric, I made some Burp Cloths (4 pcs.) and a Ribbon Tag Toy.
The Burp cloths are sewn the same way as Baby Blanket but in a smaller scale.
Ribbon Tag Toy
The idea came form here:
Happy Sewing!!!


No comments:
Post a Comment